Sunday, August 5, 2012

How to change the T-Nut

For those of you who purchase a convertible cake pop/cupcake stand,  here are some brief instructions for flipping the tnut from one side of the top tier to the other.


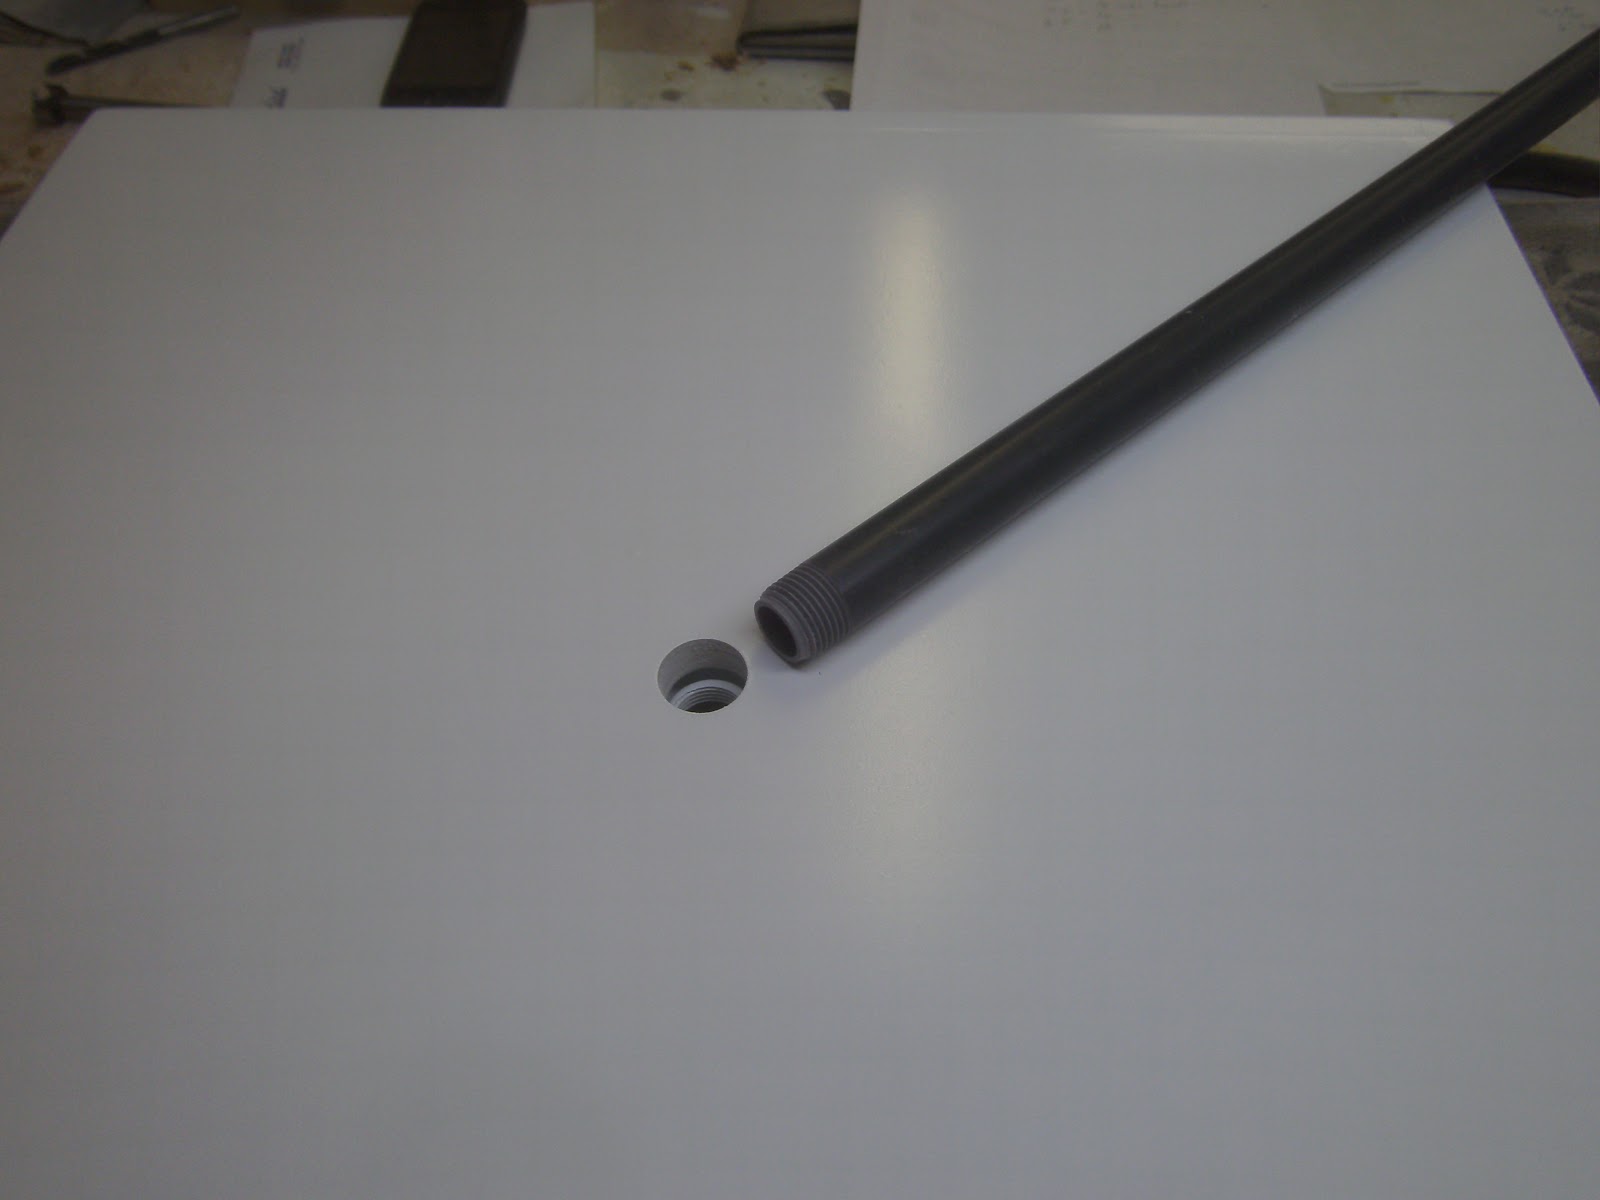
This is a shot of the installed tnut.  It is fully seated in its recess and should be at least flush with the top or slightly recessed.


To remove it, screw a 1/4" bolt (I should have included one) into the tnut from the back side.  Take a solid object like a hammer or pair of pliers and tap lightly on the bolt head until it pops out. It should look like the picture below.


Hold onto the tnut with one hand and remove the bolt. 


You are now ready to install it on the opposite side.  Note the 3 small holes for the prongs on the tnut.  They are at the 2, 6, and 10 o'clock positions.  When you flip the tier plate over, you will have the same thing on the opposite side.  I have already pre-installed and removed them so they should be would be easier for you to install again.  Take the tnut and line up the prongs with their corresponding holes and try to just push it in by hand at this point.  Once it seems like its stuck in place, lay the entire piece flat on the table and tap the tnut down into the recess with a hammer.  After it is in as far as you can get it with the hammer, you'll want to put the bolt back in like you did to remove it.  Once the bolt is in, tighten it until you feel some resistance, and the tnut is fully seated.  DO NOT let the tnut spin freely because the prongs will act like a drill bit and cut right through the wood and ruin the piece.  If you have any questions or need help, stop and contact me.  I'll be more then happy to help you.


Wednesday, April 18, 2012

Amy's Stand Assembly Instructions

This is Amy's 6 tier cupcake stand.  The first and second tiers have removable boxes for covering with fabric or ribbon.

These are all the parts layed out.

Find the base piece.
***This is the most critical point in the assembly***
This is the center support rod. If there are 2 wood pieces on the rod, remove one of them for later.  To start assembling,  the rod should look just like the picture.  Don't remove the nut, washer or wood centering ring.  Screw the rod into the base.  See next picture. 
Look under the base.  The rod you just screwed in should be flush with the bottom of the tnut.  It should not protrude any more then just a tiny bit.  If it comes up short, loosen the nut from the top, or vice versa if it protrudes too much.  If you happen to push the tnut out, just push it back in.  When you tighten the nut from the top in the next step it will pull it back into place.  This is not a flaw, it's just the way they work.
With the rod still flush on the bottom, tighten the nut on the top.  It just needs to be firm, don't crank on it hard.  Double check the tnut to make sure it is fully seated in the recess.  

                                                
It should look like this.
This is the first tier box.  You should have it covered with fabric or ribbon.  Place it on the base around the little blocks of wood to aid in the alignment.  This is not a tight fit because I left a little room for fabric so you have a little wiggle room.
Place the support spacer over the alignment disc.  This is top keep the top of the first tier from compressing downward when you tighten it all up.
Place the top on the first tier.
Add a spacer.
Install the base of the second tier.
Install the second tier box.
Install the alignment disc you took off the rod earlier.
Add the second tier support.
Now, the top of the second tier.
From here you just add spacers and the rest of the tiers.
The top tier ties it all together.  It screws onto the rod just like a nut, and again, if the tnut pops out, just push it back in.  Before you tighten it down, stand back and observe the alignment of all the tiers.  Once you are satisfied with their alignment turn the top piece clockwise to tighten it all up.  It is not necessary to over tighten it.  The rod should not protrude above the tnut at all, and if it is a little shy of the top of the tnut, that's fine too.  As long as the stand is tight, all is well.  ***Test it by grabbing one of the spacers, and picking up the stand until it's slightly off the table and supporting it's own weight.***
You're done!


Thursday, March 22, 2012

Floating Cake Stand Assembly Guide

This is my helpful (hopefully) assembly guide for the floating cake stands I build.  Below is what you should end up with.  If you need any help, let me know.


Insert rod into base and hand tighten until it's good and tight.


Install first cake layer.  This is the largest cake board.  You can drop the cake down over the rod or  put the cake on the base and poke the rod through it into the base THEN tighten the rod.

This is the rod clamp that holds the next levels.  The screw in the center serves absolutely no purpose, so disregard it .  The screw on the right (with the black head) is the one to work with right now.

Loosen both screws until you can swing the clamp apart like this.

Place it on the rod close to where you want the next level to go.

Swivel it over so it looks like this.

Tighten it somewhat snug so it doesn't move on the rod.  It will need to be adjusted up or down so there's no sense fully tightening it right now.

Install the next support layer.  Pay attention to the space between the bottom of this box and the cake layer below .  If the space  is say 1",  pull the box off, loosen and lower the clamp 1", and test fit again.  You may need to repeat the process several times to get the fit you want.

Once you are satisfied with the fit, tighten both screws on the clamp on the pole firmly.

Add next cake layer.

Repeat process for top layer.

What do you do with the extra rod?  You'll need to cut it with a hacksaw or regular saw.    I would suggest doing it before you begin assembling the cake.    Here's how I would measure it.  Measure the height of the first cake layer (say it's 6") and add 3/4".  That's allowing for the threads going into the base.  So far, you need 6 3/4".  Now add the 2nd box height (3").  Add the second cake layer height (with cake board) .  Again we'll use 6" as an example.  Repeat for the top box (3").  Finally, I would let the rod stick out of the top box at least a few inches into the top cake, how far depends on your top cake height.  Let's say (3") for arguments sake.  I came up with 21 3/4".

6 3/4" Bottom layer
3" For middle box
6" for middle cake layer
3" for top box
3" protrusion into top cake layer

Total length to cut rod = 21 3/4"

IF you "miscalculate"  you can pick up a new one at Lowes .  This link 1/2" x 24 Riser only shows a 2" version, but they have 24" too.  I'm pretty sure Home Depot has them as well.  If you ever need them longer, you'll need to get a pipe coupler and join 2 rods together.  If you need help with that, let me know.