
The fully assembled stand.
Keep in mind that all the tiers can be adjusted in height by moving the nuts and washers up and down on the rods. Make sure they all have a nut and washer above and below.
Once the tiers are where you want them, tighten the nuts on the top of each one to secure them in that position.

This is your stack of parts. You'll also have a bag with nuts, washers, and pegs. Don't take the blue tape off anything yet.
You'll need a pair of pliers or a 9/16 wrench to assemble it.

Gather these 4 pieces.

Orientate these boards in front of you as shown. Flip only the smaller board over and line up the "A" to "A" and "B" to "B" so everything is like the picture below.

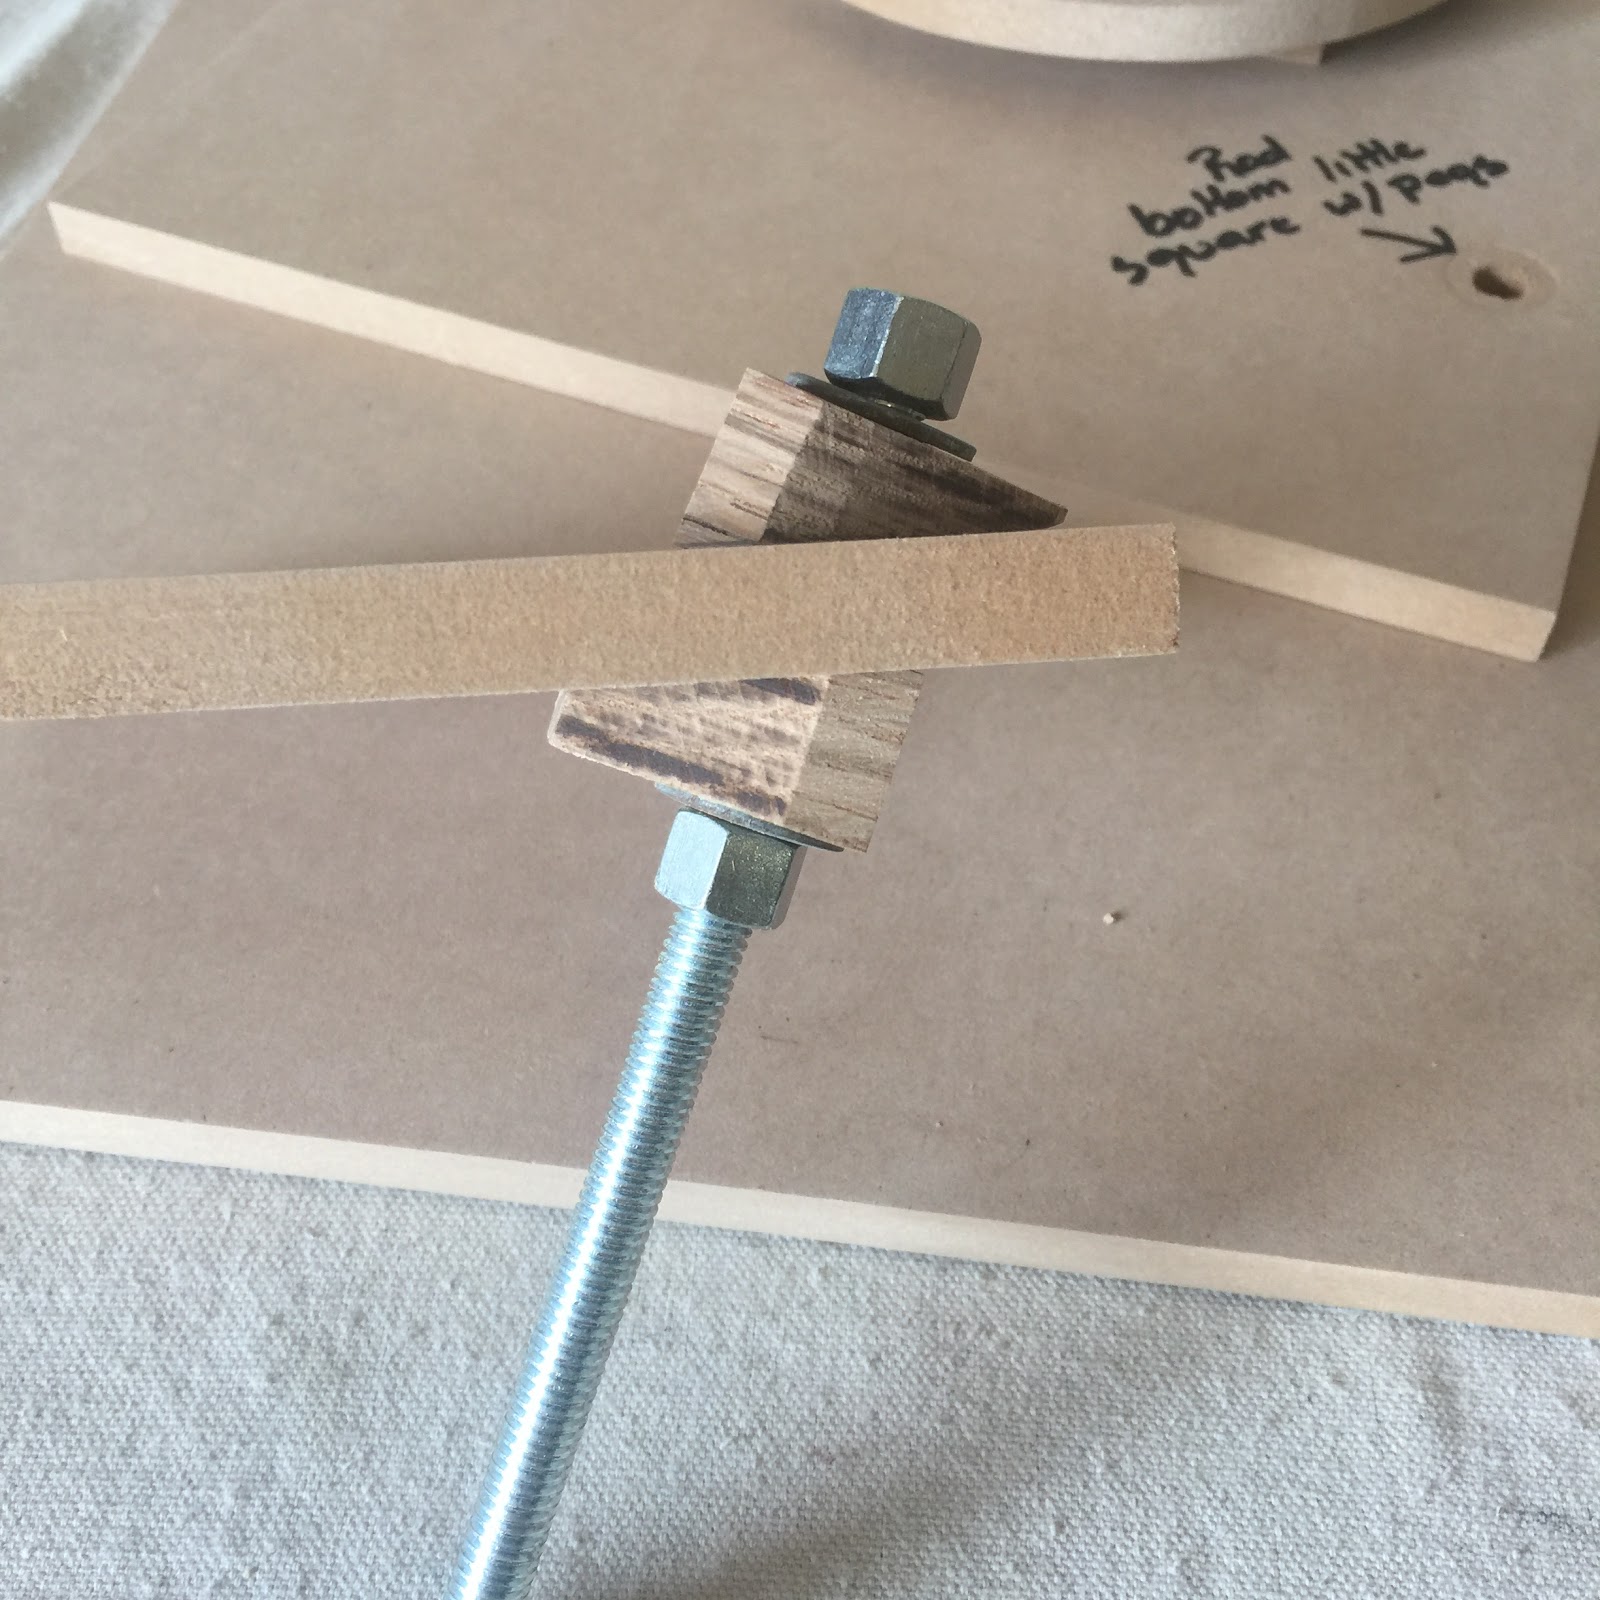
Take the tape off the long rod and the short rod (with the angled pieces of wood). Leave the nuts and washers on the rods.

Going through both boards, screw both the rods into the shiny silver things (T-nuts) that are in the big bottom board. Stick your hand underneath the big bottom board to make sure the rod doesn't stick out past the edge of the tnut. You should just feel the end of it as it is screwed into the tnut.
Tighten the nuts firmly once you have the rods correctly inserted.
Looking at the picture above, just take off the top nut, washer, and angled wood piece.
Put the small square tier (with the peg holes) on the rod, then re-install the angled piece of wood, washer, and nut.
Just finger tighten the to nut for now. You may want to adjust the height or position of the board.

You should be here. That's the hard part.
From this point I would say you'd be adding the cakes. Depending on how you position them, and their height, you are probably going to be moving the nuts and washers up and down the rod as needed.
The black marks on the rod are just general guides I used when I put it together.

When you start adding tiers, put the board on the rod and adjust the nut and washer underneath it up or down as needed.
Once you have the boards where you want them, put a washer and nut on the rod and run it all the way down to the board. Tighten the top nut securely.

This tier hold the small round angled tier with the pegs. Insert the other short rod as shown.


The small round tier with the pegs does not have any special angled wood pieces. All you do is put it on the rod and let it "flop" over at an angle. Put the washer then the nut on the end of the rod once you have it positioned where you want it.

Add the next tier.

Finish it up with the top tier. Make sure the top is in this position. You want the tnut in the center to be facing up as shown. Just spin the top clockwise to tighten it up.
No comments:
Post a Comment