Sunday, November 6, 2011

Dina's Cake Stand

Just wanted to share some feedback from Dina about her stand.  She had me make her this one with a 20" top to fit her cake and finish it a nice bright glossy white.  I love making these stands because everything always looks great on top of them, and they can be used for other things after the event it was built for.  Thanks Dina!


Dina Von P (DinaVonP) says:
This cake display turned out amazing! It looked so fabulous with our cake on it and really made the difference in our photos! Now I am using it at home to display pumpkins. So happy with this purchase!


Friday, November 4, 2011

WOW! Custom Candy Cake Stand and Cake

Once again my sister Jenniffer, owner of Cup A Dee Cakes , provided me a unique challenge to come up with a cake stand for a candy themed birthday cake for one of her best customers.  She gave me some basic dimensions, and I took mental notes of things she mentioned during our conversation that she wanted to do with the cake.  I threw some general ideas at her and we went on with our days.

I get a great deal of pleasure tormenting her because she is my baby sister, and I told her nothing of my plans for the cake stand.  She pretty much gives me carte blanche to create unique stands for her, and I love the creative freedom it gives me.  True to form, I tortured her and didn't reveal the stand until I unboxed it at the Car Barn where she and I set up the cake.  There were lots of OOHs and AAHs when I put it on the table, but everyone really flipped when I turned on the stands lights!  

On a side note, she asked me to come help her load the cake up and when I saw it, I was truly amazed at the end result.  It was AWESOME!  It had to weigh 50 pounds and had so much detail on it.  Two things that stood out to me were the giant gummie bears that were under the top tier, and Mater bursting out of the bottom tier.  Each gummie bear was 6 servings at 120 calories a serving,  and Mater talked!  Jenniffer had somehow mounted his voice box in the cake board and installed a button along the front edge that made him talk.  It was really cool, but we had to add the little blocks under the corners of the bottom cake board so Maters speaker could be heard better.  Pretty much everything on the cake was edible, it was just amazing.

 Birthday Candy Cake and cake stand
The edge of the cake stand featured small glass candies that I recessed and lit up from the back with battery powered LED lights, and I also put in tiny blinking multicolored rice lights that were also battery powered.  You can also see the little black button in the edge of the cake board that operated Maters voice box.

Candy Cake Stand Lights
The legs were made to look like stacked Lifesavers, and I made the feet from real lollipops that I cast in resin.

Candy Cake Stand Leg and Foot Detail


Candy Cake Stand Alone


I had a great time designing and building this stand, because it was really as fun as it looks.  It was a nice change of pace and I was able to use some new products and techniques that I can incorporate into future projects.  Even though Jenniffer and I didn't have a clue as to what the other was doing, I think we knocked it out of the park on this one!  It's just amazing how working apart the whole thing came together.  Thanks Sis!


Friday, October 28, 2011

Floating Cake Stand

Anita from Creative Cake Confections recently had me make this stand for her.  The cake she made needed to be supported somehow, and she didn't want to use dowels or straws.  I explained to her how my stand worked, and although I sensed she was still nervous, she decided to put her trust in me.


This wasn't the first stand of this type I had made.  My ever faithful sister Jenniffer at Cup A Dee Cakes served as my guinea pig a couple of times with these cakes using the same basic design.


Anita's stand (below) was made so she could adjust the height of the blue separator boxes on the support rod so they just rested on the cake below, but carried all the weight of the cake above.  I also made her the white cake boards for the cakes to sit on.  The clamps I used on the pole were adjusted by using a screwdriver to loosen them and slide them up or down to the desired height and once secured would not budge.  I think it's a great alternative to the straw and dowel method of support.


Anita sent me this nice message after the event.

"Cake turned out great and the stand worked beautifully just like you said. I'll email you a picture shortly. Feel free to use it on your site if you'd like. I'd like to post a link to your Etsy page on my blog if you are ok with that. I know there are many decorators interested in that style of stand. Thanks again for your help!"

Anita

Thanks Anita for trusting me!

Friday, October 21, 2011

Large Cupcake Stands for Roxie and 1199 Guest!


Roxie contacted me about making a cupcake stand for her.  She was doing an event that required her to have desert for 1200 guest!  She sent me a wonderful drawing of what she wanted and we came up with this.
Shop Shot
The large stand was made with 28,24,20,16,and 12" tiers with 8" spacers, and the two smaller cupcake stands on either side were made with 20,16, and 12" tiers with 6" and 4" spacers.  They made quite an impressive display.

Here is a shot from Roxie's display, and her comments below.


"Hey Mike,

Here is the finished display! Towers looked great and received tons of compliments! Thanks again for all of your help!

Roxie"


Tuesday, October 18, 2011

Beer Bottle Cap Cake by Cup a Dee Cakes

Most of you know my sister bakes some awesome cakes but every once in a while she pops in with something different (at least it is to me).  I was seeing what she was up to and ran across this one  http://cupadeecakes.blogspot.com/2011/10/guinness-bottlecap-grooms-cake.html  It's so cool!

Monday, October 10, 2011

Website is finally up!

I just finished and published my new website!  You can view it here http://mywoodworkingsolutions.com .  Please give me all the feedback you can, good bad or ugly.  It's my first time.  Thanks all.

Saturday, October 8, 2011

New design! Balloon shaped cupcake stand.

How's this for something fun and different!

I started working with a couple a few months ago who are planning on having an "UP" themed wedding. They wanted to see if I could make something to fit the theme and to incorporate a replica of the house from the movie at the base of the stand. This is what I came up with.

I designed it to hold a maximum of 150 cupcakes and made 2 removable risers on the top tier. The risers were made to give the top a more rounded look, and also give you the ability to add a cake topper. Despite it's top heavy appearance, it is just as stable as any of my other stands because of the large 16" square base and the larger center support rod. It can be easily taken apart to transport or store. Fully assembled it stands almost 33 inches tall and I can adjust the size of the bottom spacer for adding a basket or other decoration. The paint color can be changed. 

This stand has so many possibilities for you to be creative!  See it at my Etsy shop.


Cake boards or cake drums made to order!

For those of you that need them I am making cake boards and cake drums!  I've been making these for my sister at http://www.cupadeecakes.com/ for a while and she has been very happy with them.  The cardboard ones are fine for certain things, but sometimes you need a little extra support.

These are basic, no frills cake boards. You will need to cover them with foil or paint them.   They are made from 1/4 and 1/2 inch thick mdf that is smooth on both sides and are very stiff.  I edge sand them and I can also drill a hole in the center (No charge) for a dowel if you let me know the size you need. Custom shapes and sizes are available, just let me know what you need.   Go to my Etsy store to see my prices.


Saturday, October 1, 2011

First Birthday Pink Cupcake Stand

I just wanted to share another customer comment and her pictures of a custom cupcake stand from my Etsy shop.

Alexis wanted me to make a smaller stand for her daughters first birthday with the glitter paint modeled after this one.  I made that stand for my sister Jenniffer, who owns and operates Cup a Dee Cakes, for her booth at the last bridal show here in Chattanooga.

Thanks Alexis!

"Hi Mike! I just wanted to share some photos of the cupcake stand at work at my Daughter's 1st Bday party. It really made the event (along with the cupcakes...lol)! Thanks again!


Alexis"


Saturday, August 13, 2011

Aimee and Chris's Custom Wedding Cake Stand

This wedding cake stand was done back in June for Chris and Aimee's wedding reception.  They contacted me back in January with their ideas after they saw my round spiral leg cake stand on Etsy.  They liked the design, but wanted it square and painted custom colors to match their wedding color scheme.  The top measures 14.5 inches square and it is 7.25 inches tall.  The colors they chose were Bonnie Cream for the base and top, and Enchanted Evening for the spiral legs.  The entire stand was sprayed with a water based matte polyurethane so it wan't too shiny.  Below is the picture they sent me, along with their comment.

Thanks guys!


Hey Mike:

Attached is a picture of the cake stand you made for us in action at our wedding.

Thank you again. Everyone absolutely loved the stand!!!

Chris & Aimee

Sunday, July 24, 2011

A Couple of Finished Cake Stands and Starting a New Design

Here are two newly completed custom wood cake stand orders from my Etsy customers.  These are photos from inside my shop, so excuse the mess!  I've been too busy to be bothered with something as mundane as cleaning :)

First, there is Carolines stand, and the design process that led to the final product .  She started out liking this one:
Original Design X Stand


This was my first truly original design.  It is 8" wide at the base, 5.5" tall, and it had a 12" top on it.  She wanted an 18" round top on hers, but after testing the stability with a top that big, I decided it was too unstable.  I told her we needed to make the base a little wider, and that I wanted to change the way the legs met in the middle.  This was the first design change in rough form.  I maintained the same height, but stretched the legs out to 10" wide.  I also changed the way they joined in the middle.
Modified base on left side
When I got home and uploaded the pictures,  I didn't like the way the legs lost the arc on the underside.  I had a thought about making the center joint come up more so the arc would flow up to the center section, instead of running horizontal like the way it is in the picture.  I sent the picture to Caroline along with my idea, and she agreed, so back to the drawing board!  This is what I came up with.
Final revision
I liked this much better and so did she.  Notice how the center is raised slightly and the legs maintain the arc?  It just seems to flow better to me.  Now the end result.
Finished Stand
Caroline chose to leave all the edges very neat and square and also the paint color, which was a Martha Stewart color called Araucana Teal, available at The Home Depot.  I think it looks great!

This just goes to show how projects evolve.  I think the alterations have changed the look so much that it can't really be described as an "X" stand anymore.  I've had a few people tell me it looks more "Asian" in design.  What do you think?

The next stand is also an original design.  It is my Arc Leg Stand.  Aileen contacted me on Etsy and was sounding a little frazzled to say the least.  She's getting married July 30th and needed an oval to cake stand to fit her cake.  You ever tried to find an oval top cake stand?  Okay you found one, now is it the right size?  Didn't think so.  Aileen needed her top to be be 19x15.  The one I have listed on Etsy is one I did for one of my sisters cakes that was18x14.5 and is 5" tall.  I made this new one for her by stretching the dimensions out a little bit.
Aileens Oval Top Cake Stand

Finally, I have a new project/order in the works this week.  The mother of the bride contacted me in need of an 8 tier cupcake stand and four matching individual cake stands.  The project involves scalloped edges, organza lace ribbon, and fuchsia/cream paint.  I will need to do a separate blog about this one because of the challenges it has presented.  Stay tuned for more, but here is a picture of the rough prototype.

Now it's off to the shop I go!


Tuesday, July 19, 2011

How to Assemble My Cupcake Stands and How to Shorten Them.

When you receive your stand and get it unpacked, you should have a pile of parts similar to this.  Be careful handling them.  They may have a protective coating of a beeswax polish on them and are very slick.  Just wipe them down with a soft cloth.

To modify (shorten) your stand, see the end of this blog.
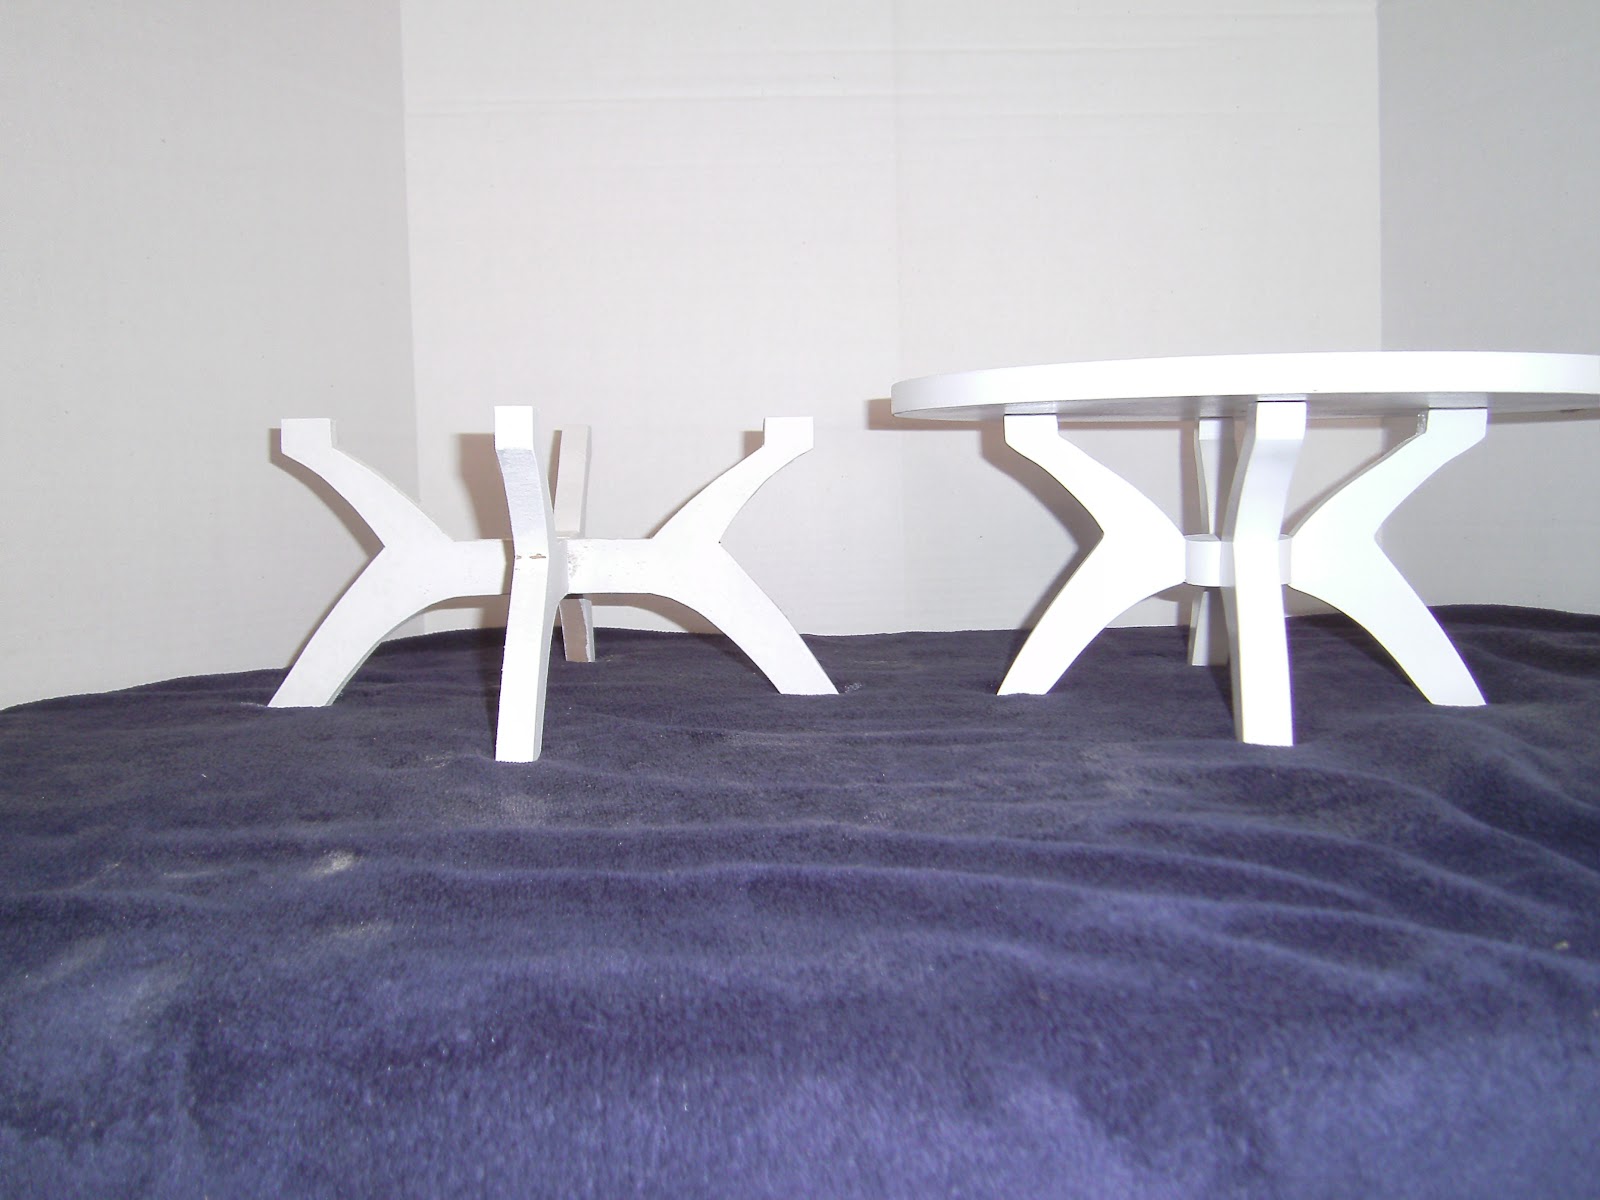
9 Tier Cupcake Stand Parts


Before we proceed, I need to explain what a T-nut is for those of you that aren't familiar with them.  These nuts are used to hold the entire assembly together.  There is one in the base and one in the top tier plate.  They look like this (uninstalled).

***IMPORTANT***  Pay particular attention to the following.  It will eliminate any problems with assembly. These are already installed for you.

To install these I first use a 3/4" forstner bit, to drill a nice flat bottomed hole a little less than 1/8".  The depth is important because you want it to be level with the surface.  I then drill a 5/16 hole all the way through the board for the barrel of the t-nut to sit in, and for the rod to pass through.  

I then place the t-nut over the holes, with the prongs down, and hammer it in until it's seated.

***REALLY IMPORTANT***
The four little prongs hold the t-nut in place, but it can fall out.  This is not a failure!  If it does, simply line up the prongs with the holes they made in the wood and push it back in.  Take care when inserting the rod, or you'll just push it back out.  You will see further on in these instructions how, when everything is tightened up, they really embed themselves.  Now, on to assembly!

First locate the base.  This usually the thickest board with rubber or felt "feet".  Make sure the t-nut is fully seated, then place the base feet down on a table or floor.

Next, take the tape off the threaded rod (It's just there to keep the washer from getting lost.).  Leave the nut and washer on the rod.

Gently insert the rod (end with nut and washer) into the hole and screw the rod into the t-nut.  You will want to turn the rod until it's just level with the top of the t-nut on the bottom.  You will probably need to use your free hand to feel underneath so it doesn't stick out too far.  If it does, it could scratch the surface you set it up on.  If the nut above the washer stops it from going in far enough, just back it off a little.


Grab a 7/16 wrench or a pair of pliers and tighten the nut on top of the washer.  Tighten it until it's just snug.  Double check the t-nut on the bottom.  It should now be fully seated in the base.  Problems can occur here when you start tightening the nut on the top.  If the t-nut is not seated beforehand, it will spin and act like a drill bit cutting into the base.  It's not a major problem, it just makes assembly more difficult.  You should now be at this point.

You may now start stacking!  Slide a spacer onto the rod.


Then your largest tier plate.


Repeat until you get to this point (no top installed)

The top can now be screwed on.  Again take care not to push the t-nut out.  Screw the top down until it's just about snug.  Now walk back a few steps and check that the spacers are fairly straight, if they aren't, move them a little until they are.  Once you are satisfied it all lines up, finish tightening the top.  Once again, it doesn't need to be overly tight.  The rod should not extend past the top of the t-nut.  ***NOTE***  I assemble these before shipping so I can be sure it all fits.  If there is a problem, contact me.  

You're done!

To shorten your stand you will need a length of 1/4-20 all thread rod available at hardware stores and home centers.  A 6 foot piece is about $5.  You will also need at the very least, a hacksaw.

Install the full length of the rod just as you did above in the assembly instructions.  Place the amount of spacers and tiers you would like on the rod to achieve the desired height, leaving off the top tier plate.  Hold the top tier plate next to the rod as in the picture and make a mark on the rod.

Before cutting the rod with the hacksaw, remove the last spacer (in case you slip!).  You should end up with something like this.

You can now finish the assembly.  Save the extra rod for possible future modifications.

I hope these instructions will help.  If you have any questions feel free to contact me.

Mike


Friday, July 8, 2011

Busy Days Ahead!

My Etsy store is doing great, and I'm starting to see an increase in the amount of truly custom request on my cake stand and cupcake stand orders.  Lots of cool design ideas and colors coming up.  Not that I mind doing the same ones all the time, it's just nice for a change to do something different.

My little sister Jenniffer at Cup A Dee Cakes has another bridal show coming up in a few weeks at the Chattannoga Convention Center, and I will be showing some new work there in her booth.  I also found some unique molding that I will be making stands with.  Lets just say babies and horses are involved!  I really need to get some new designs out there, but I've been too busy trying to keep up with my orders.  I promise to get them done soon though...

Sunday, July 3, 2011

6 tier cupcake stand painted silver

My sister Jenniffer at Cup a Dee Cakes called me again about making a stand to fit the amount of cupcakes she needed for a brides reception at the Grandview.   She needed the stand to hold 140 cupcakes, an 8 inch cake topper, and it also needed to be painted silver.

I made the stand 6 tiers tall, with 4" spacing between each tier plate, and tier sizes of 8,10,12,14,16, and 18 inches square.  Fully assembled it is 26 inches tall, and all the cupcakes fit on the stand.  None are on the table.

The paint presented a small problem.  I could have used a silver Rustoleum to paint it, but the fumes would have been too bad.  I really wanted a latex, and after shopping around, I found some.  The Home Depot carries a line of paint called Precious Metals with Martha Stewarts name on it.  I chose a color called "Tin" for the paint over other silvery looking ones because it seemed the closest to silver to me.  The others looked too dark or had a green tint to them.  I have to say I was impressed with it, but it was pricey at $20 a quart.  They have a wide variety of colors, faux finishes, and GLITTER paint (Don't tell Jen).

All in all, I think it turned out well.  I have the design for sale here at my Etsy shop, along with more pictures.   Go have a look!

Saturday, July 2, 2011

Customer Photo of 9 Tier Cupcake Stand at Reception

Long time, no post!  It's been crazy to say the least.

I just wanted to share a photo and comments sent to me from one of my customers. Cassandra lives in Fairbanks Alaska and this is from her wedding reception.  She was a pleasure to work with!

Hi Mike!

Wanted to share a photo from my wedding reception on June 11th! The cake stand worked out so well! Everyone loved it!

If I get some better shots I'll send them your way :)
Casandra


Tuesday, May 10, 2011

Top Secret Cake Stand Finished and on Etsy!

When I started this back in November, I knew it was going to be something special.  It is absolutely the "prettiest" cake stand to date.  I guess the biggest challenge was the corners.  I wanted them to look like the pattern blended, and wrapped around, not just stop and butt up against a different pattern on the next side.  There was a lot of carving, adding material, carving some more, and sanding.  I really worked hard on the corners, and while not perfect (for me), they do have a flow which is what I was after.  I don't know if anyone else would have noticed or cared, but I did.  Because so much extra time was required, I have had to put a high price on it.

I really hate to price this so high, but as you cake decorators know already, our time is what we never seem to charge for correctly.  I kept a stopwatch close by to keep track of the time I spent actually working on it and was WAY off of my "guesstimate".  It's probably because of my advanced years, but I've come to the realization that my time is worth something.  Forget about all the tools, machines, and various supplies I have taken a lifetime to accumulate, these things I would have anyway because of my hobby.  Time is what I never seem to have enough of.

  Quote taken from my Etsy ad.

"I finally got it done!  I teased this stand on my blog back in November when I first started to work on it and I knew it was going to turn out just beautiful.  It turned out so much better than I expected.  It created a few unique challenges that I had to overcome during it's construction, but my patience paid off in the end.  It is far and away my most labor intensive stand to date, and now that I have all the bugs worked out, I can offer them for sale.

This stand is 17 1/4 inches square on the top, 23 inches square at the base, and will raise your cake 3 1/2 inches off the table.  The roses, buds, vines, and leaves, are very heavily embossed in a continuous vining pattern all the way around the base, and their detail is wonderful.  The glossy white paint really makes them "pop".

Due to the amount of labor involved, these stands are my most expensive to date, and do require at least 3 weeks lead time.  For this price I can build yours up to 18 inches on top.  For larger sized cakes up to 24 inches, an additional $50 will be charged.  Also, please note that your stand will have sharp corners at the base, not rounded like the pictures.  This one is for display purposes and it gets abused.  When I ship them they are packed to protect the corners."