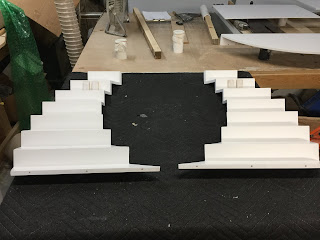
Assembly Guide for Staircase Stand
**Please handle the stair parts carefully making sure the are supported and not allowed to flex.**
Assembly is easiest if you put it together upside down. Position the 2 step sections on a blanket as shown.
Position the top shelf as shown.
You will attach the top shelf to the stair sections with 6 screws (3 on each side).
**IMPORTANT**
Start the 6 screw until they just start poking through the other side of the top shelf. While leaving the step sections laying flat on the table, raise the back shelf at an angle as shown. Paying attention to the screws, align them with the holes in the stair sections. Make absolutely sure they start into the pre-drilled holes in the step sections. Once you are satisfied with the alignment, you can tighten the screws. Tighten the screws until they are fully seated. There is no need to tighten them any tighter.
Make sure you have an assistant help support the top shelf while you install the screws.
Once the screws are in, it will stand on its own.
Install the 2 upright supports by inserting them between the guide blocks.
Assemble the back onto the 2 uprights with the last 6 screws. The back has countersunk holes for the heads of the screws, so make sure they are facing you.
Again, tighten the screws just enough to seat them fully.
Now to the hard part, flipping it over.
You have 2 assemblies to deal with, the uprights with the back, and the stair section.
**Try to have a helper available here.**
Remove the upright section from the stair section, flip it over and place it in an upright position.
Now take the stair section, making sure its properly supported on both sides, and flip it over as well. Place it on the upright section. Don't worry about lining it up perfectly with the upright guide blocks at this time. Just get the stair section sat on the uprights safely.
Now that the stairs are on the uprights, you can wiggle things around until the uprights go into their guide blocks.
You're done!


No comments:
Post a Comment